Berg Everlasting Gouge Update
Contributed by Randall Nelson
Since I wrote the original article about the Berg “Everlasting” gouge that I had found, I have seen another similar gouge for sale on Tradera, the Swedish version of eBay. I bid on that chisel and was successful. I have now had a chance to examine this new “Everlasting” gouge and believe I can clear up a few of the unanswered design questions that the first chisel had presented.
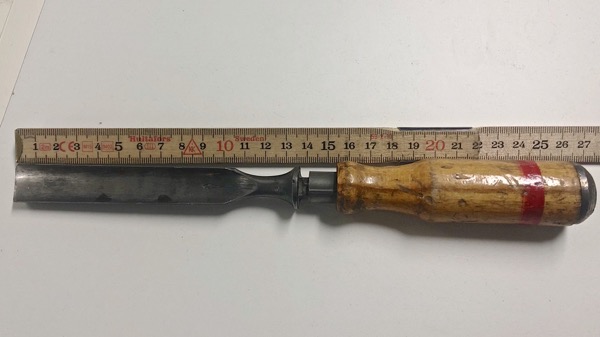
Looking at both these gouges, the blades appear to be slightly heavier than the normal Berg blades, made more in the fashion of the heavier Jernbolaget gouges. This makes me think they were intended for harder work, as I had stated in the original article.
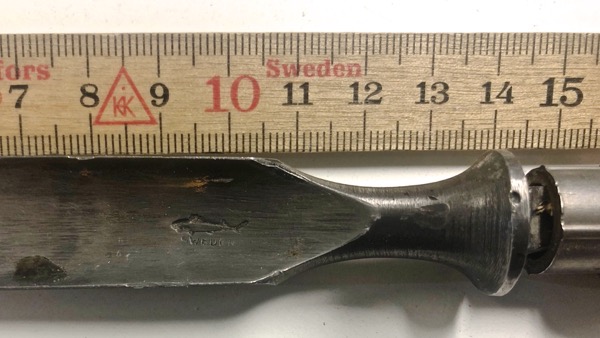
The shark stamp on this chisel is a slightly earlier design, not the usual “modern shark” that was used on the first “Everlasting” gouge I had found. That could indicate it was made earlier, or just that they used an older stamp that was still functional.
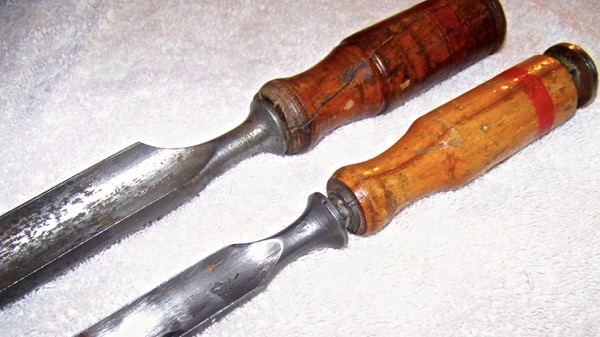
Like the first chisel I examined, this one has been used quite a bit. The domed metal cap on the end has taken quite a pounding with a metal hammer, but still retains its original domed shape. This chisel also has a beech wood handle that is similar in design to any ordinary wood chisel handle, but it is without the defining grooves and “shoulder step” of the typical Swedish wood chisel handle. It is just a simplified version of the design used on the “first” Everlasting gouge. As with the first chisel, this one does not have a ferrule between the blade and the handle. Also, this handle has a red paint stripe, approximately 3/8th of an inch wide, around the upper third of the handle, although without the defining grooves of the earlier example.
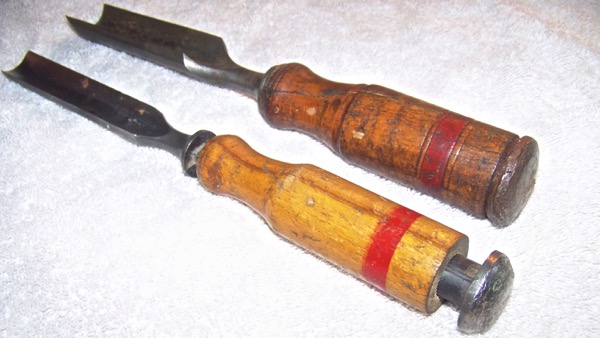
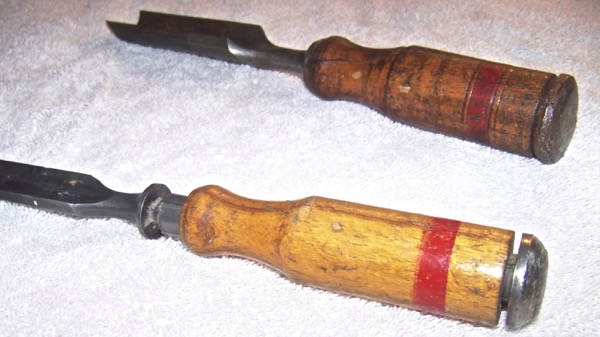
Unlike the first chisel, this example was not put together as tightly, so the construction mechanism that was employed for making this “Everlasting” handle was more readily discernible. It appears that the beech wood handle was first turned, then the center was bored out completely, using a 1/2” drill bit. The inner assembly of the handle consisted of a steel tube, with the walls approximately 1/16” thick and having 4 slightly raised, equally spaced ridges on the outside that run the length of the tube. The domed steel cap is firmly attached at the end of the tube. They are obviously two separate pieces but no weld is visible, so I must assume that the cap piece was made in the fashion of a giant screw, with a threaded insert that screws into corresponding threads inside the steel tube. I have attempted to loosen this cap, but without success. Not wishing to destroy the chisel, I have not been too aggressive in my attempts to remove the domed cap from the tube.
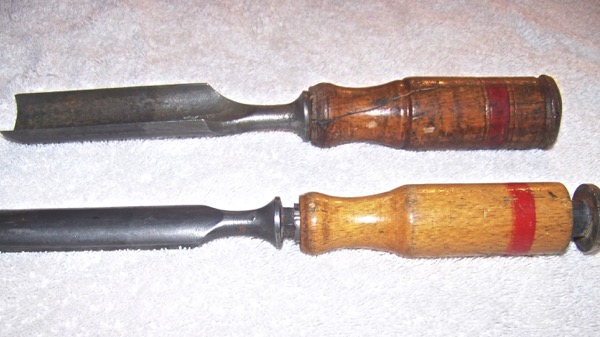
Once the cap was attached to the steel tube, the tube would have been driven down through the hole in the handle until the domed cap was tight to the end of the handle. The raised ridges would have secured the tube from turning inside the wooden handle. The handle was probably made from beech wood since it is slightly softer than the typical birch Berg usually used and so was less likely to crack when the tube was driven into the handle. The steel tube would have been cut to the same length as the handle if a ferrule was not going to be used, as it appears was the assembly method for the first chisel I described. This left a 3/8” diameter hole inside the steel tube, into which the tang of the chisel blade was driven. Possibly this would have been a squared tang, rather than the usual tapered tang found on most carving tools. I have also seen examples where the tang had barbs cut into the corners, to help secure the blade into the handle. Once assembled, if the tang was a tight fit such a handle design would be almost impossible to disassemble.

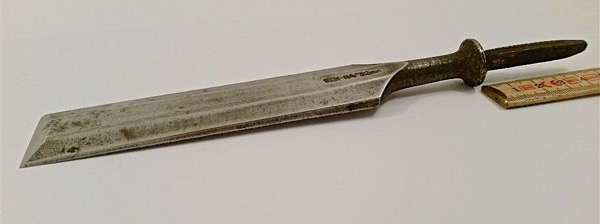
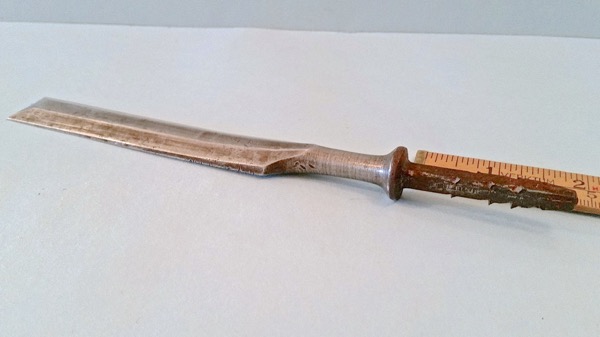
For some reason, the steel tube of this second chisel is 1/2” longer than the wooden handle, so when the domed cap is tight to the back of the wooden handle the steel tube projects beyond the front of the wooden handle. Because of use, the wooden part of the handle is now slightly loose. When you strike the end cap with a hammer it tends to drive the wooden handle back towards the domed cap. If you hold the chisel and strike down into a surface, the wooden handle tends to slide down the steel tube towards the blade.
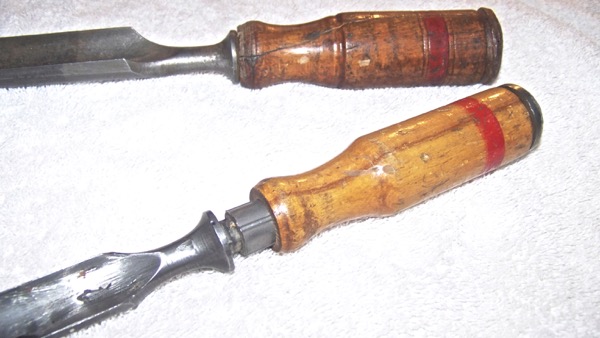
I can’t believe that the workers at the Berg Company would have ever done such a sloppy assembly job, so the only other conclusion I can reach is that they had originally put a 1/2” brass ferrule between the blade and the handle. It would have fit over the steel tube and “dressed up” the handle with the more typical decorative flourish that one would expect when getting such a special-order tool, especially from the Berg Company. However, since the tang of the chisel blade did not insert fully into the steel tube (it jammed up about 1/4” shy of being flush), the brass ferrule would never have been a tight fit. I guess the customer decided that it was still good enough for what they needed to do, since the chisel obviously has seen lots of use.
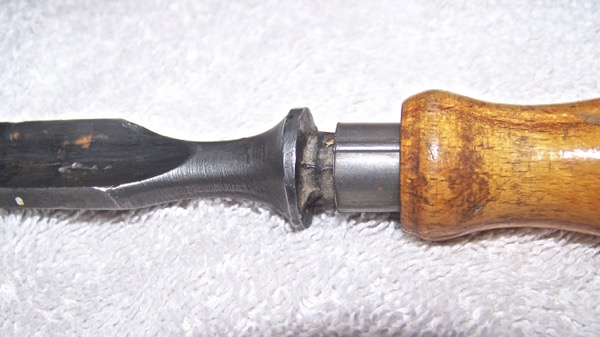
With this internal steel tube handle design, you would only get one chance to do the assembly, unlike a regular wood handle where the precise fitting of the tang into the handle is an important part of the assembly process. With this design, once you started to drive the blade’s tang into the handle’s steel tube, you were committed. If things didn’t fit together properly, I think it would be almost impossible to disassemble and try again without breaking something. If the ferrule proved to be too short, there would not have been any way to take off the short brass ferrule and then fit on a longer one in its place. Possibly, the sliding action of the wood handle when the chisel was being used eventually started to crush or maybe even crack the loose brass ferrule. Once the ferrule began to deform it would have been easily lost, resulting in the tool we see today.
Contributed by Randall Nelson
Just speculation
Perhaps there could have been leather washers like on a Eastwing hammer. The leather would perish and drop off leaving the space